David J McLaughlin
Sr Fullstack Developer
Migrating My Backup From Google To BackBlaze
Gsuite, Google’s collection of paid services aimed at businesses recently re-branded as Google Workspaces. Along with the name change has come new tiers of service offering different benefits, the main one of concern for me is the amount of Google Drive storage available. Previously Google had two tiers, Basic, and Business, Business offered unlimited Google Drive storage for $12 per user per month. The only requirements to create a Business Gsuite account were a credit card and domain name, making it an easy choice for unlimited backup after Amazon canceled their unlimited cloud storage service. The wheel keeps on turning and Google has done the same, canceling their unlimited storage option unless you contact a Google sales agent and qualify for an Enterprise Google Workspaces account (and pay whatever price that comes at).
Enter Backblaze
BackBlaze is one of the few services that I know of that still offer “unlimited” backup at a reasonable price. I don’t actually have enough data to backup to put me over the now 2TB Gsuite limit, but I’m sure I will some day. At present on my Windows desktop I have 4 5TB drives in a storage pool, 1 drive for parity, giving me approximately 15TB (12TB) usable space. Then I have a media server and a Proxmox machine, between these two I have another 10TB, 8TB usable. Most of that is data that isn’t worth backing up, what I care about between the two is only about 700GB.
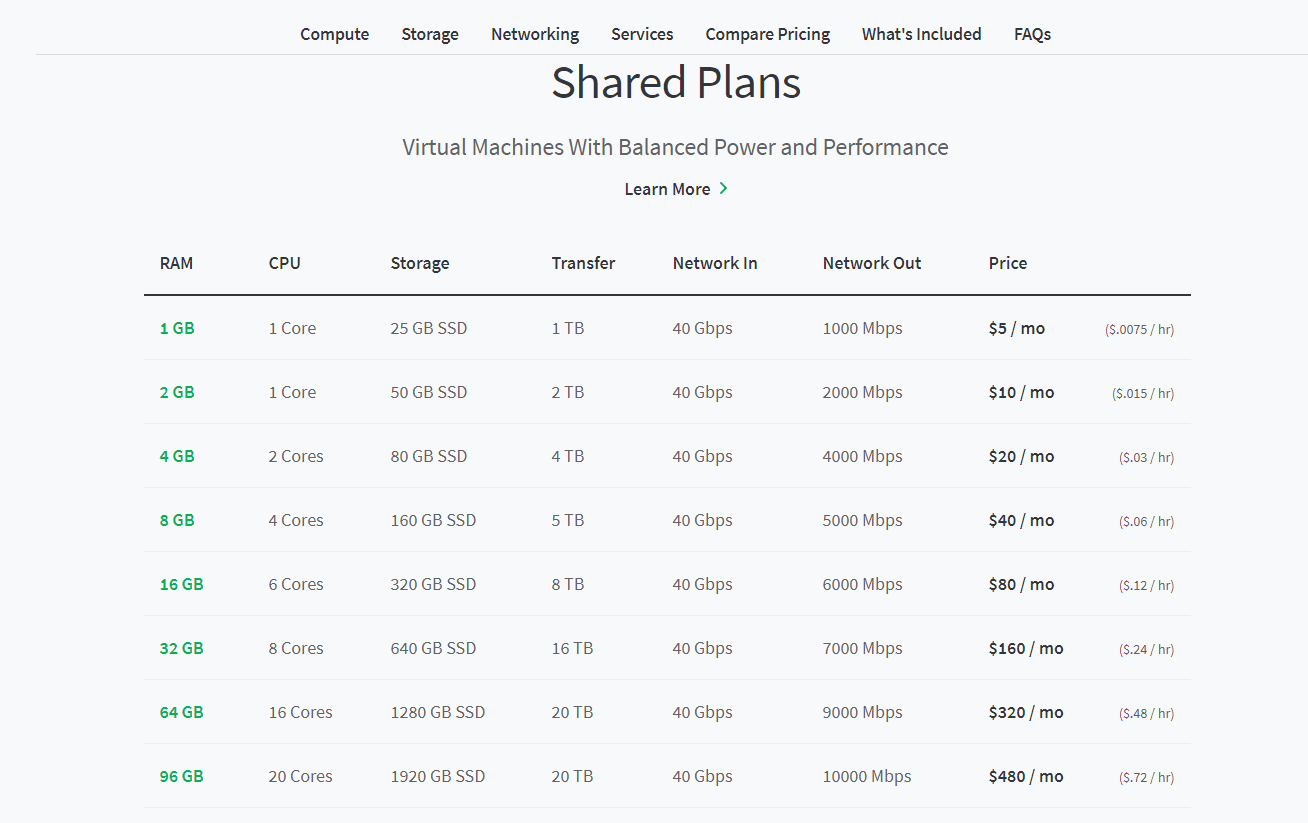
In the beautiful utopia that exists only in my head I could just disable Google Backup and Sync, install the BackBlaze backup client and let my data sync to their service. Unfortunately I have internet through Comcast with no option to switch, so my upload speed is capped at 5Mbps, meaning in the best case I could have all my data stored with BackBlaze in 14 days. More likely it would take closer to a month based on past experience. That’s a bit too slow for my liking, so we need a bigger pipe. My first thought was to just spin up an EC2 box, download all the data from Google and reupload to BackBlaze, but network out can be a bit pricey at the bigger cloud providers, so I decided to see what my options were. I just need a cheap VM with decent upload & download speed, after looking at a few VPS providers I settled on Linode. Linode only charges for data out (which is common) and each VM you provision comes with a free amount of data out based on the machine size, prorated from when you spin up the machine. So if you provision a 1 CPU 2GB machine half way through the month, you would only get 1000GB of network out transfer for free, of the listed 2000GB, see their pricing page for more detail. At the time I signed up a free $100 credit was available for new customers, since I’ve long since used my Azure and AWS credits, Linode seemed like a good choice to try out.
Starting the backup process
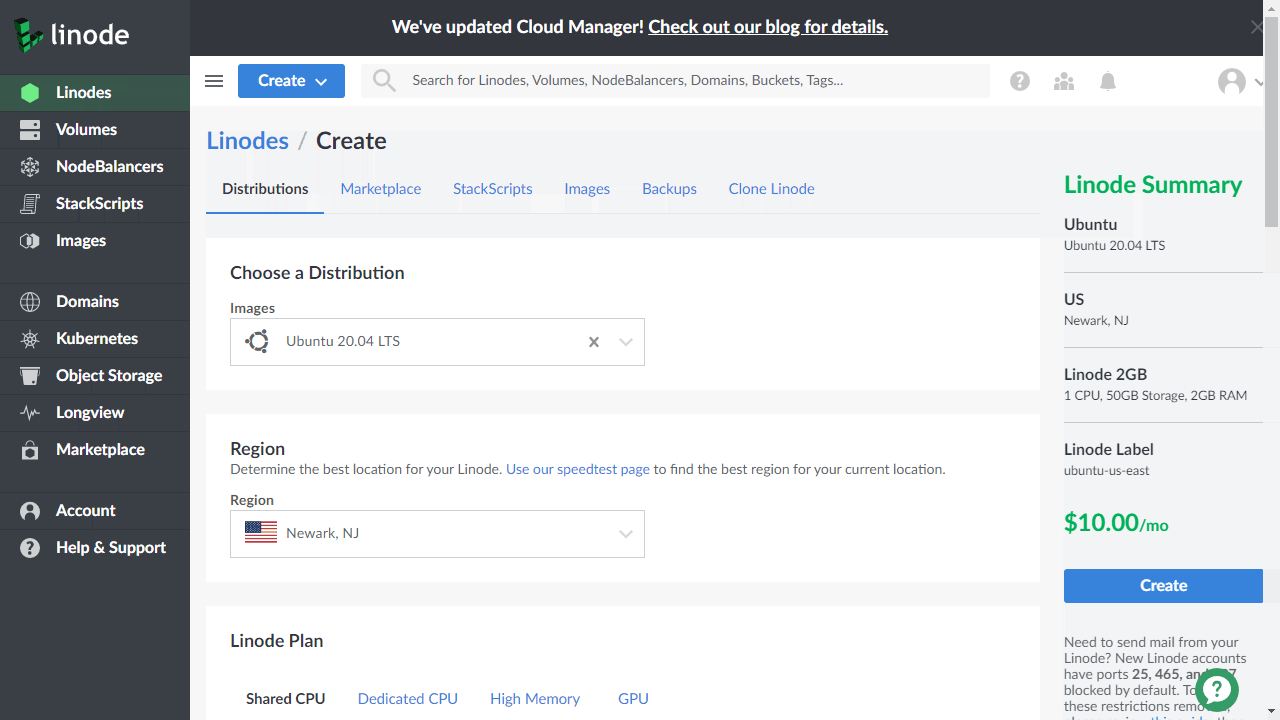
The first step is creating a VM, in my case a 1 CPU, 2GB RAM box in the Shared CPU environment, running Ubuntu 20.04 LTS. I typically reach for Ubuntu purely out of familiarity, for this purpose we only need to run RClone, so distro choice isn’t too important. RClone is a file sync/management tool that supports a wide range of protocols and storage providers, I’ll be using it for the Google Drive support, see the providers list for info on supported services.
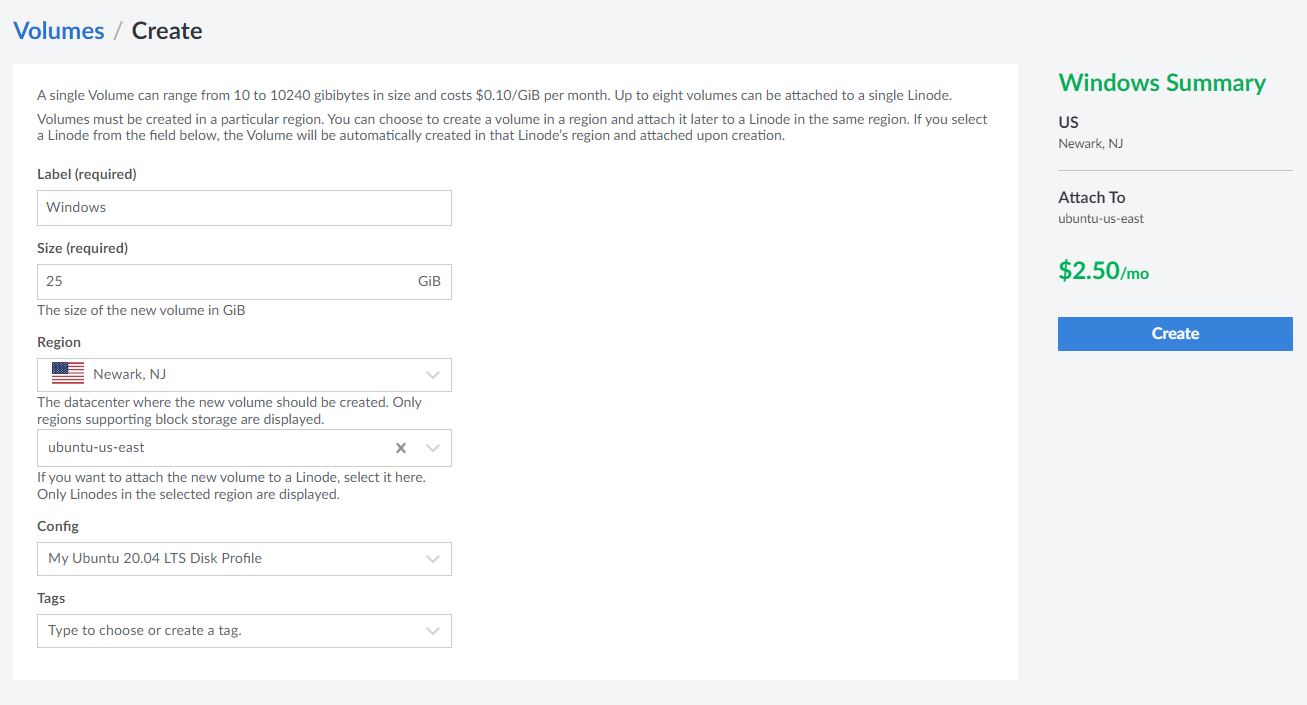
After a quick minute for Linode to setup our VM we’re ready to connect. Linode offers a web-shell, or you can SSH in directly with the public IP. We also need some temporary storage that we can use to store all the downloaded files from Google, adding a volume is pretty straight forward in Linode, use the Volume tab in the web-UI, after your volume is created the UI will give you instructions on how to mount it to your VM.
Let’s get RClone setup, sudo apt install rclone, and we’ll run through the Google Drive configuration, which is nice and quick. For the Use auto config? prompt you’ll need to choose n, which will print a url you’ll need to open in a browser to give rclone permission to access your Google Drive storage. You’ll want to do this over ssh so you can easily copy the url and paste it into a browser on your local machine, if you use the Linode web-shell you likely won’t be able to easily copy the long url. Starting the download is pretty simple, rclone -P --stats 10s copy remote: /mnt/google-drive-backup/, remote: being the name you picked for your Google Drive profile, and /mnt/google-drive-backup/ being the path you want everything downloaded to, -P will print the progress of the operation, and --stats 10s will update the progress every 10 seconds. Depending on how much data you have and how large (CPU & RAM) of a VM you picked (larger typically means faster network) the transfer may take a while. I started mine pretty late in the evening so I left it overnight.
Now that all the data is downloaded we need to BackBlaze backup client for Linux, and oops, looks like there is no BackBlaze Linux client… I probably shouldn’t be surprised by this, and probably shouldn’t have waited until after everything was transferred to attempt to install it, but come on, what year is it again? After a bit of reading it seems this is a deliberate choice on the part of BackBlaze, reading some comments from BackBlaze employees, the idea seems to be that Linux users will over utilize the unlimited service. Fair enough I suppose, it seems the recommended option for Linux users is their B2 service, which is still very cheap but offers no unlimited option.
I did a bit of looking around to see if any third party clients existed, I couldn’t find any, but it seems Wine may be an option. I opted to switch to a Windows VM, I didn’t want to risk there being some weird issue with the data, or having to deal with potential crashes or other weirdness. It would still take at least a few hours for the VM to upload all the data, so I wanted to stay on the safe side. Of course that was easier said than done, Linode doesn’t have an option to setup a Windows host.
Setting up Windows on Linode
Even though Linode doesn’t officially support Windows, it looks like they use QEMU, and through the web UI they expose some options that might be helpful for us. We just need a volume with Windows installed and we should just be able to boot it. Linode doesn’t have any way for us to upload a custom volume (at least not at the time of writing), but we can just create one locally and pipe it over SSH. What we need is a disk with Windows installed attached to a Linux environment (with SSH and dd), and an empty disk we can write to on Linode’s side.
We’re going to be using dd to read the Windows disk byte for byte, and write it to another disk on Linode’s side, this should work with a physical Windows install, but I’m going to be using a VirtualBox VM to make things a little easier for myself. Depending on your upload speed you’ll likely want to keep your Windows image as small as possible. If you have a good uplink then you can use the Windows Enterprise VM that Microsoft publishes, you may want to trim the partition size in the windows disk manager before starting the transfer. Otherwise you can get the home edition ISO from Microsoft.
Install Windows like normal, create an account, set a strong password, and setup Remote Desktop. Next we’ll boot into a Linux Live Environment, I’ll be using Finnix, it’s the same tool Linode uses for their recovery environment and it has everything we need. Shutdown the Windows VM (or physical machine), create a new VM for Finnix, and attach the Windows VM hard disk. Boot up and leave Finnix at the command line, we’re going to prep our Linode machine, and come back to Finnix.
Create a new volume that’s large enough to transfer your Windows disk to, 25 GB was more than enough for me, if you’re using the Enterprise VM you’ll likely need a good bit more.
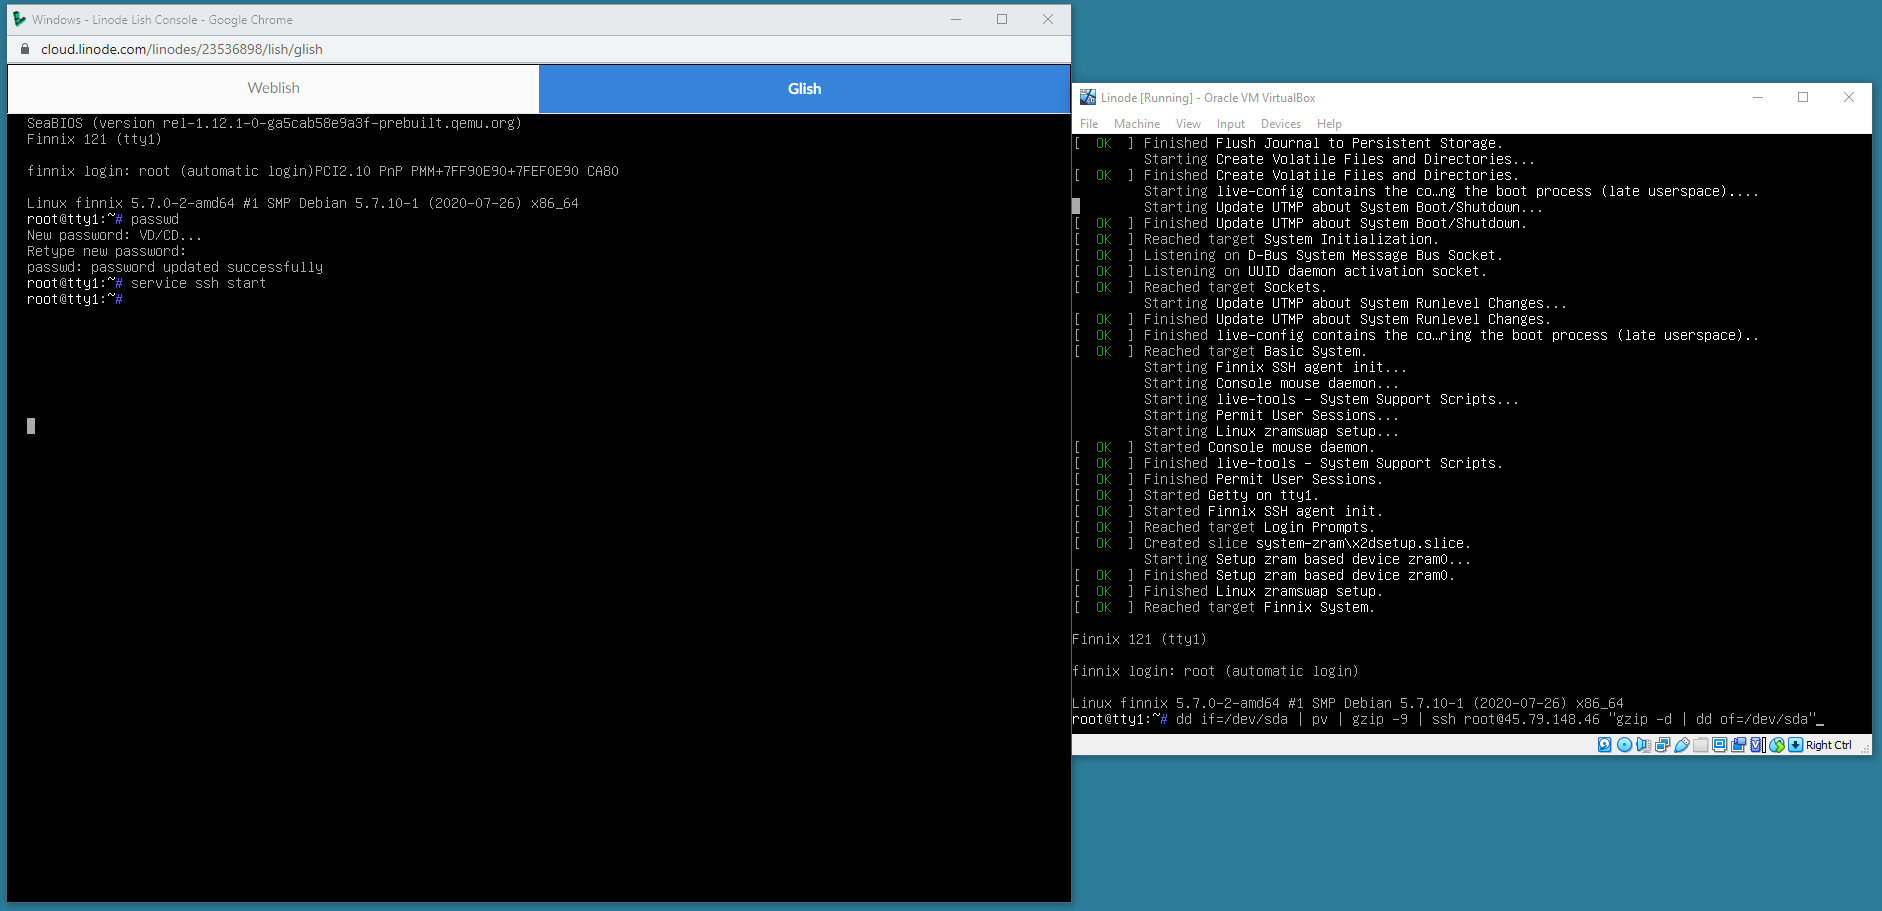
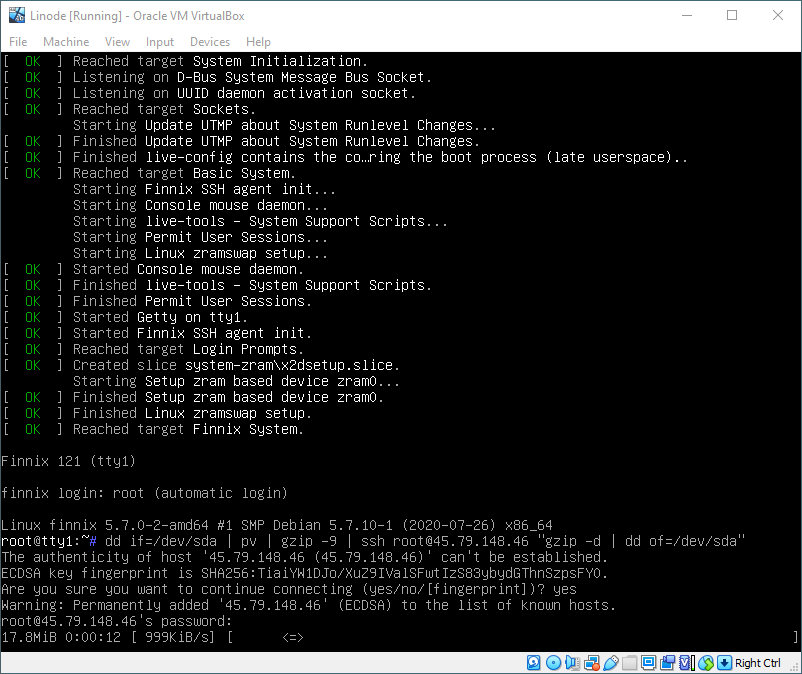
Now we can reboot our Linode into rescue mode (not strictly needed) and start transferring our Windows image, if you’re using rescue mode, then you’ll need to use the web-shell since SSH isn’t enabled by default. Make sure you attach the empty Windows volume you created in Linode, once Finnix is booted, set a password for SSH, passwd then start SSH service ssh start. Now from our local Finnix VM we can start the transfer, dd if=/dev/sda | pv | gzip -9 | ssh [email protected] "gzip -d | dd of=/dev/sda". dd if= will read our Windows disk (/dev/sda is the path for my disk, yours may differ), pv will give us a progress indicator, gzip -9 will compress our bytes before we send them over SSH, then we pipe into SSH pointed at our Linode box, on the remote side we run gzip -d to decompress the byte stream, and write it to our empty volume with dd of=.
For me this will take a while, I’ve got roughly 18 GB to transfer. I started this early in the morning and it was finished sometime in the afternoon.
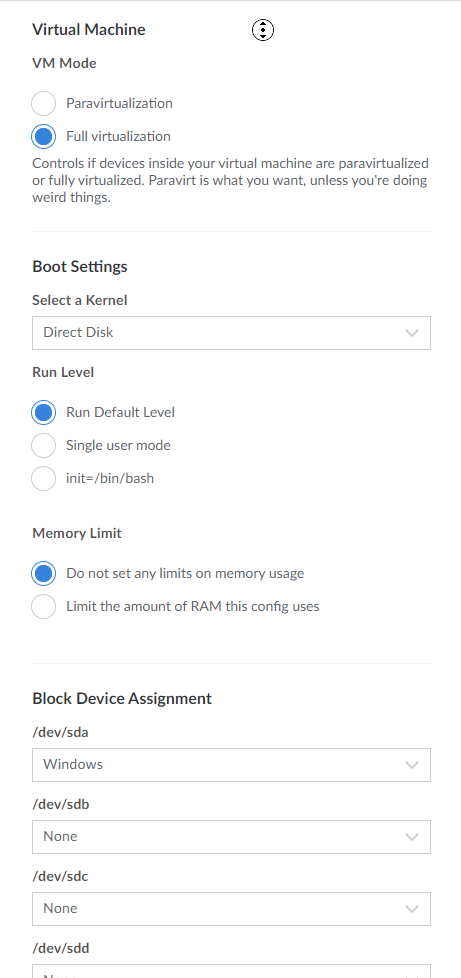
The last thing we’ll need is some minor configuration tweaks to get Windows booting. Create a new configuration, set the virtualization mode to Full virtualization, the kernel to Direct Disk, and /dev/sda to the volume you transferred Windows to (in my case I labeled the volume Windows).
Now when we boot our Linode VM we can see the Windows startup screen in Glish, a few moments later we can RDP using the machine’s public IP. Finally, light at the end of the tunnel, let’s download the Backblaze client and upload our Google Drive backup.
Filesystem Trouble
The volume I used to download my Google Drive backup is formatted ext4, which isn’t accessible from Windows. Not the end of the world, there are a bunch of options we have for filesystems that we can use on both OSes. Linux has native support for Fat32 and a few options for NTFS, as well as some other choices like Btrfs, or exFat we can use. I can just create a new volume, format it for Windows and copy everything over, it should go at least as fast as our initial download with rclone, but I’m betting it’ll be quicker. Fat32 is out since I’ve got some files over 4 GB, so I’ll use NTFS-3G. The open source NTFS-3G utilizes FUSE, I’ve seen people complain about performance, but that shouldn’t be an issue for my purpose, I can always bump the VM up to have more CPU if I really need it but I’m doubtful I’ll have any issues.
apt install ntfs-3g, then we can use mkfs.ntfs to format a newly created Linode volume. mkfs.ntfs -Q -L "Local Disk" /dev/sdXY, -Q will perform a quick format which will speed the process up significantly. Now we just mount the newly formatted disk and we can start the copy. cp -R <source_folder> <destination_folder> and we’re off, right? cp works great if you have a small amount of data to copy, but can be painfully slow for large copies. I’ve used rsync to speed this up in the past, so lets do that, rsync -avP <source_folder> <destination_folder>, -a is a quick way of saying you want recursion and want to preserve almost everything, -v for verbose output, and -P to print progress. This runs a good bit faster, more than twice as fast as cp, but still slower than the original download from Google Drive.
At this point I was tempted to just restart the rclone download and point it to the new NTFS drive, as that would be quicker. But there are a lot of factors at play, we’re running in a shared environment on Linode, so other users may be affecting out performance. Our two volumes may share the same physical disk on Linode’s side, meaning our copy from one volume to another may just be slower. We could be running into those ntfs-3g performance issues, but a quick check of CPU and RAM shows we’ve still got some room on that front. Or there could be some hidden overhead in the way Linode’s hosting setup works.
I figured since I have so many small files I’d see if there was an easy way to run multiple instances of rsync, each operating on some portion of the files, and maybe that would speed things up. In essence, what we need is to list all the files recursively, divide all the files into n number of buckets, then spawn an rsync process for each bucket. A quick search brings us to a project that does just that, msrsync, its a small wrapper to parallelize rsync with the hopes of maximizing throughput. Installation and usage instructions can be found on the linked GitHub page, basically you can use it the same way you would use rsync just add the -p flag with the number of buckets you want (e.g. msrsync -p 4 ...).
Finally, now things are cooking, the copy is moving roughly twice as fast as the initial download. After a few hours of waiting it’s time to start the Backblaze sync. Detaching the volume from the Ubuntu VM and attaching it to our Windows VM, booting up and we see an unformatted disk in Windows… Uh oh; a quick detach and re-attach and the Ubuntu VM shows all the data is fine? After way too much reading, it seems like this just happens for some people, I was able to find a ton of instances online of people creating NTFS volumes with ntfs-3g and having issues getting them to show up in all different versions of Windows, then lots of other people trying to recreate the same thing on their machine(s) to find everything working perfectly. I spent probably way too long trying a ton of tricks to get the disk to be usable from Windows, rewriting the first 512 bytes of the disk, using chkdsk, reformatting the disk from in Windows with the Quick format option, nothing seemed to work. In the end I created a new volume in Linode, formatted it NTFS in Windows and was able to mount it, use it and transfer files from Ubuntu to Windows without further issue. I’d really love to know more about what the cause was, but my weekend is almost over at this point, and this project was only supposed to be maybe an hour of effort and a bit of waiting, so I’ll save this mystery for another time.
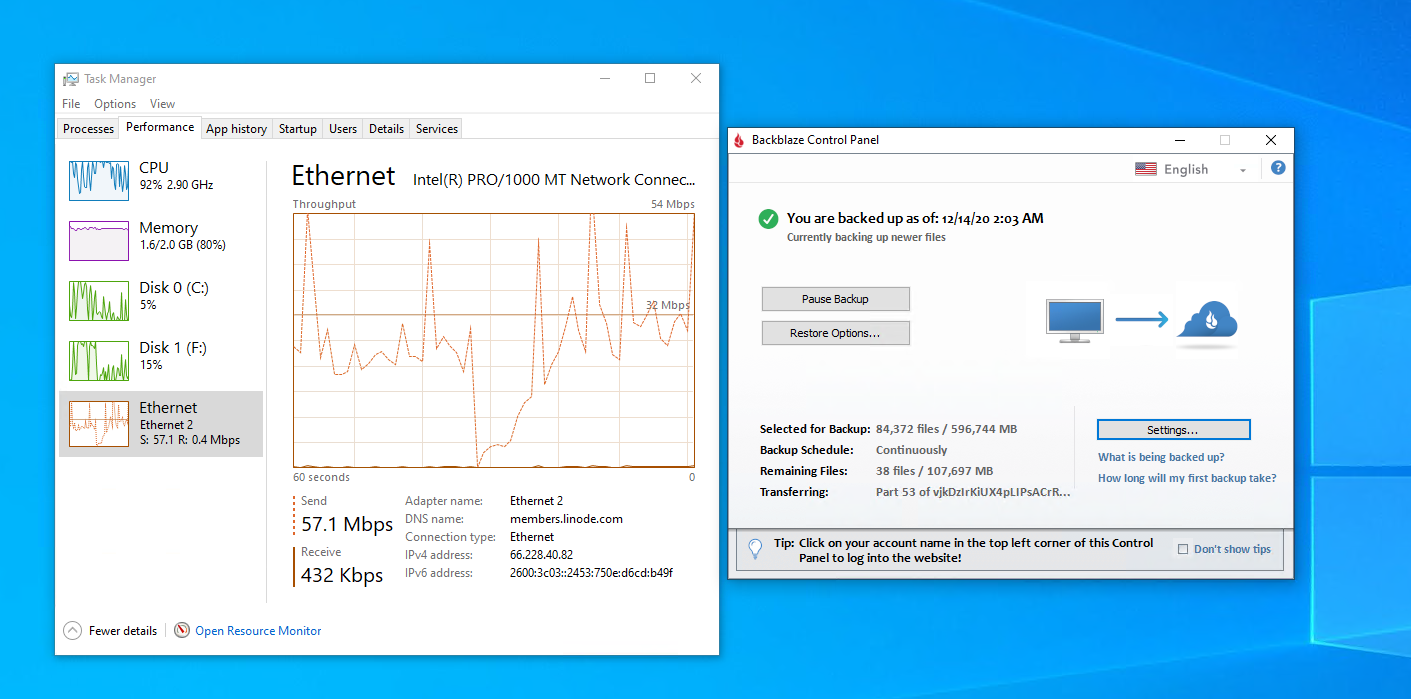
With all the data available on Windows, let’s start the backup. Backblaze offers a 15 day trial, let’s signup for that and start the syncing process. The backup client seems a bit dated, but that’s okay, slightly more bothersome is that you can’t exclude your C drive from the backup. On this VM that’s not an issue but I have a ton of junk on my desktop’s C drive, a handful of junk VMs, game installers, videos I don’t really care much for, etc. So it kind of sucks that I can’t easily exclude the whole drive as it adds around 500 GB of data to the backup that I don’t care for… Anyways, at this point it’s evening time on Sunday, I left the backup to sync overnight.
Syncing Backblaze with my desktop
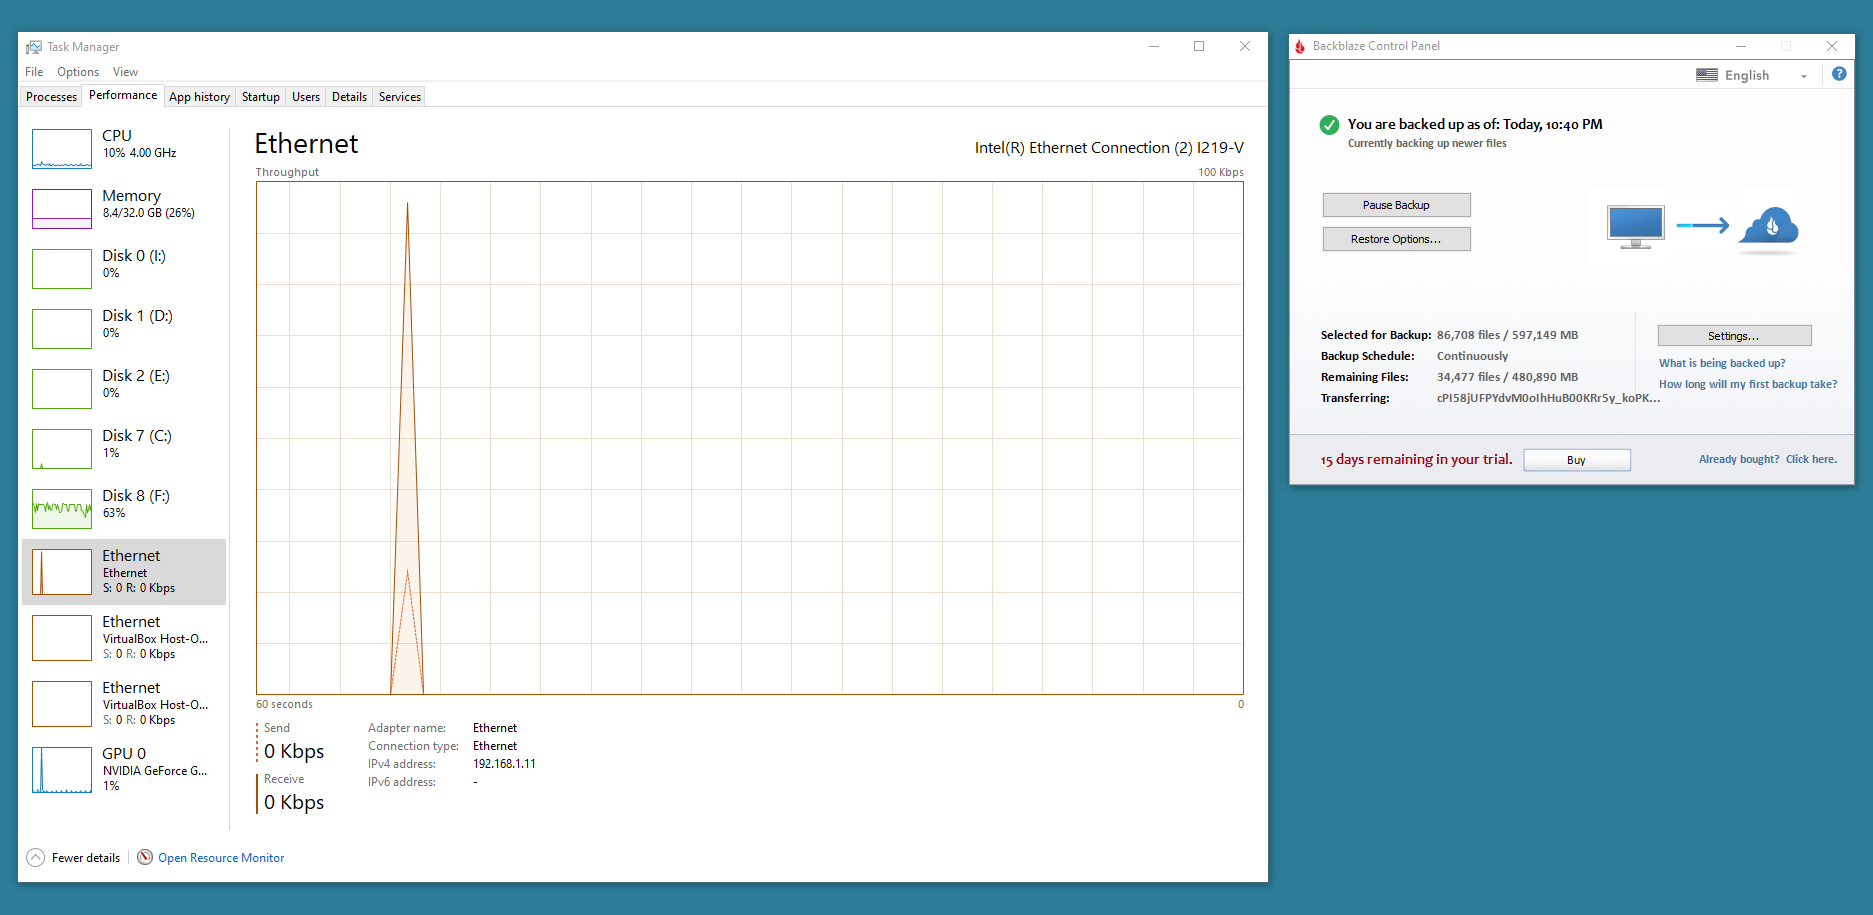
I installed the Backblaze client on the desktop and inherited the backup, it seemed to be taking a while to scan all the files on my system. I ended up manually excluding all folders on my C drive to try to speed up the process. The backup client started churning through all my local files relatively quickly, it got down to about 30% files left, I shutdown my desktop for the night and figured I’d resume in the morning.
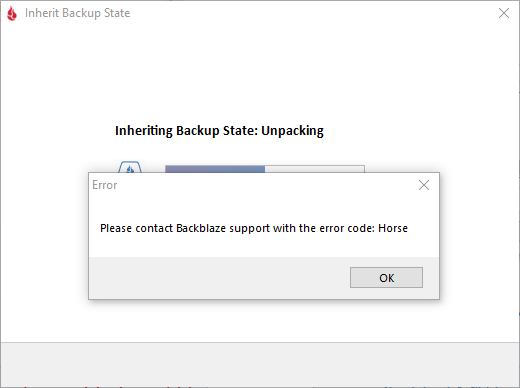
Of course it couldn’t be that easy. The backup was stalled, I tried changing the filters, adjusting the performance throttle, adding and removing target drives, uninstalling and reinstalling, I couldn’t get it to restart. Using Process Monitor I found log files and configuration in the C:\ProgramData\Backblaze\bzdata\ directory. Backing up and cleaning this directory didn’t help either, and the logs files don’t have any meaningful information for me. Clearing all the configuration and restarting the backup inherit now just results in “Error code: Horse”, even from a fresh Windows VM…
Obviously something is messed up server-side, so I contacted support, attached the log files and we proceeded to very slowly walk through most of the things I had already tried. The only new step we tried was to switch to the beta release of the backup client, but still no luck. After 3 or 4 days of no progress with support I reuploaded the backup from Linode, then re-inherited, and made sure not to turn off my PC until the inherit process was complete.
Final thoughts
Overall this simple weekend project. which was supposed to be mostly waiting, ballooned into a monster week long effort, just about everything that could have gone wrong did. Had I bothered to check what platforms the Backblaze unlimited backup supported, I could have saved a ton of effort by sticking with what I know and using AWS. I would have had to pay a few dollars out of pocket for an EBS volume and a Windows server EC2 box, and possibly a few extra for network-out transfer, but I would have saved a lot of time. I did get to try the Linode platform, and over all I’m a fan, everything was quick and worked well. And I appreciate them giving users access to some of the more advanced controls, without them I wouldn’t be able to run Windows without Linode having to support it themselves.
On Backblaze’s side, I’m not sure how confident I am with their software after this nightmare experience. I’m hoping the issue I ran into was just some weird 1 in 1 million issue that can only happen during the backup inherit process, but not much else with the software/website really inspires confidence. Why sometimes when I switch from continuous backup to manual and click ‘Backup now’ does the Backblaze client suddenly find a ton of files that have existed for days on my drive and only then start syncing them, despite showing I’ve been backed up as of some recent timestamp? Why can a shutdown during the inherit process corrupt my backup server-side and prevent me from being able to restore it, even to another computer? Why do I need to add every directory from my C drive to the exclude list to prevent hundreds of GB of useless data from being backed up? Why are there hundreds of files in the bzdata directory, and what seems like dozens of configuration files? I’m sure I’m being overly judgmental, but nothing makes me feel like this backup client is a well thought out piece of software.
Even with all that criticism of Backblaze I’ll likely stay a paying customer. I am going to look into other providers but even if I can find another good service I’ll probably keep Backblaze for redundancy, it would be hard not to at their price.
In total I used just under $60 of my Linode credit, a lot of that was having multiple VMs and Volumes offline for a week. I’ve cut my data backup bill a bit more than in half, and got access to ‘unlimited’ backup storage, at least for the time being. Overall a bit more than I bargained, but I got to learn some new tricks and learn about a new hosting platform.
